Role Based Access Control
Overview
SaaS applications sold to businesses must have an authorization model that enables the administrator of the application to control the permissions that users have inside the app. This is colloquially known as “RBAC” (which stands for Role-Based Access Control), but often goes much deeper in terms of enterprise requirements.
Most SaaS applications start with a simple model - often simply offering differentiation between what “normal users” and “admins” can do. This can easily be implemented using a field in the user database and encoded as an “admin” scope/permission in an access token. Applications that do this are essentially using their authentication system for authorization.
However, this is an anti-pattern for enterprise authorization: customers of almost any size require that different team members be assigned only the functionality they need to do their job (see the principle of least privilege). They quite often have different permissions for different resource types. A fine-grained access model cannot be implemented in the authentication system alone.
Furthermore, larger customers have compliance requirements such as SOC 2 or ISO 27001, requiring their admins to maintain fine-grained access control for their users. Along the same lines, enterprise customers often want audit trails of every authorization decision made by your application.
As a result, SaaS applications need to offer Enterprise Authorization to be EnterpriseReady.
The “Enterprise tier” of SaaS applications
Building this from scratch may sound like a lot of work (and it is!) However, the most obvious differentiator between “professional” and “enterprise” tiers of SaaS applications is the sophistication of the authorization model. Building this right can result in much larger average selling prices (ASP’s) for enterprise customers.
Moreover, putting it off until later in the application lifecycle can be a costly mistake: adding a fine-grained authorization model into an existing solution that does not have a distinct authorization system can be as hard as retrofitting multi-tenancy into a single-tenant application. There are significant architectural considerations for both, so we highly recommend doing the work as early as possible in your application’s lifecycle.
Fortunately, there are now a set of vendors (including Aserto) that offer developer-friendly solutions for incorporating enterprise authorization into your SaaS application.
Evolution
The first step in the journey to becoming EnterpriseReady is to go from a coarse-grained set of global permissions (e.g., “viewer,” “editor,” “admin”) to a set of fine-grained permissions. We’ll call this the permission model.
Permission Model
There are three main things to consider for your permission model:
- The **resource types **you define.
- The set of permissions you define over those resource types.
- The resource granularity over which your customers can set those permissions.
Let’s illustrate these with an example application that will be familiar to most: an_ applicant tracking system (ATS)_.
Resource Types
Every application has a set of “nouns”: in the example we’ve chosen, an ATS has _candidates**, **jobs_, and _reports_. These are the **resource** **types** that the application manages.
Permissions
Every one of these nouns has a set of “verbs,” or operations, that can be performed on them: for example, you can list, create, read, update, or delete a candidate or a job. The cartesian product of these represents the set of permissions that your application can expose to users:
Roles: a Rollup of Permissions
Our simplified ATS offers a reasonable number of permissions, but most real-world applications have dozens or even hundreds of distinct operations, and therefore, distinct permissions. Most of your customers rarely want to manage each of these permissions individually, so you end up defining a set of roles that “roll up” these permissions in common configurations. For example, you may have a candidate-viewer role with read-only access to candidates, and a candidate-admin role that can create, edit, and delete candidates. Similarly, job-viewer and job-admin can roll up the respective permissions for jobs.
Resource Granularity
If the (“nouns”) in your application (jobs, candidates, reports) are resource types, then the resources your application manages are instances of those types.
The other important parameter you can tune in your authorization model is the resource granularity for which you can set these permissions. For our ATS example, we could set that dial at various points:
- Tenant-level: permissions extend to all resources of that type (e.g., all jobs)
- Organization-level: tenants consist of multiple organizations, and permissions extend to resources of that type within each organization (e.g., all engineering jobs)
- Individual resources: the permissions for every resource can be set individually
Resource Groups: A Practical Way to Organize Resources
Assigning distinct permissions to each resource may provide the highest level of granularity. Still, that flexibility often comes with an added administration burden: each resource has to be managed individually, and it’s often hard to get an overall view of who has access to what.
In practice, most applications define an organizational construct — a project, organizational unit, or group — and assign permissions uniformly to every resource in that construct. We call these resource groups.
How Your Customers Map Their Users to Your Permission Model
So far, we’ve described the set of tradeoffs you can make in designing your permission model. You also need to consider how your customers map their users onto this model.
While authorization is a distinct process from authentication, it’s clear that the authorization system must relate to and integrate with the identity provider (IDP) that is used to authenticate the user (e.g., Okta, Auth0, Azure Active Directory). The IDP is the “source of truth” for user identities and could also be the source of truth for roles or extended properties about the user (their department, title, or manager).
However, your customer’s IDP can’t possibly know about the permissions that your application exposes, and you can’t reasonably require your customers to add these application-specific attributes into their identity providers.
Therefore, your authorization system needs to pick up where the IDP leaves off: it must contain a directory of all the users and attributes that come from the IDP, and offer a way to extend those attributes with application-specific permissions and roles.
There are a couple of common patterns for doing this - RBAC and ABAC.
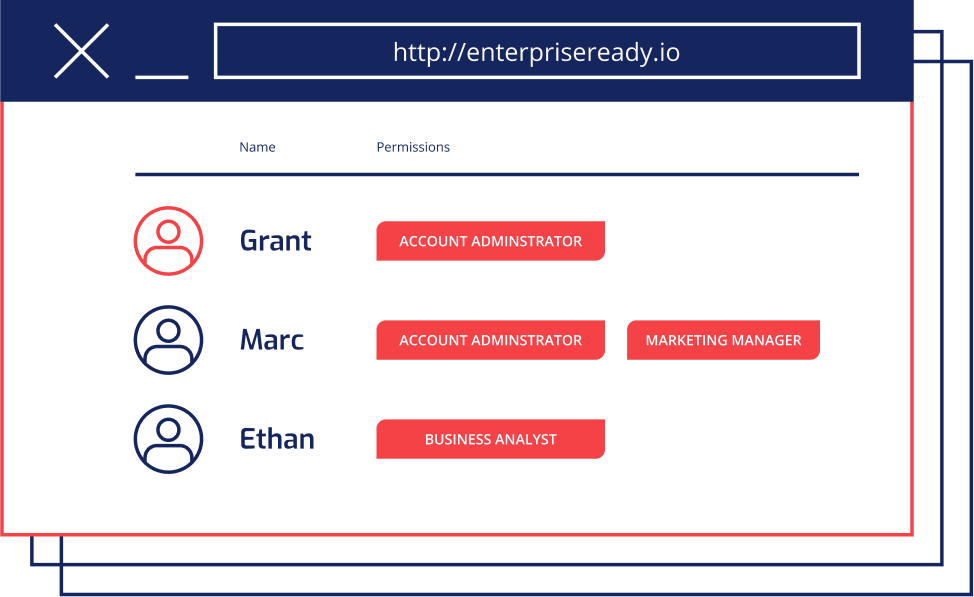
Assign Users to Roles (‘RBAC’)
The most common pattern we see in SaaS applications is to map your customers’ users into your identity provider via an enterprise single sign-on provider such as Okta, Auth0, etc., and require an application administrator to assign each of these users into the roles defined by your application. This is commonly known as role-based access control (RBAC).
Sometimes that process can be automated, where a role in the customer’s directory or identity provider maps cleanly into a role that your application defines. As your application moves upmarket and you sell into larger enterprises, those customers tend to require both flexibility and automation in how their users map into your roles.
Map User Attributes to Permissions (‘ABAC’)
When mapping your customers’ users into your roles and permissions crosses from a static, simple process into a dynamic mapping of user attributes into permissions, you’ve crossed into the land of attribute-based access control (ABAC). The primary advantage is giving your customers finer-grained control over what attributes from your customers’ identity provider are used to determine the user’s permissions in your application. The challenge is that this kind of customization often requires some form of solution engineering and extends implementation timeframes.
Encoding user attributes as assertions that are baked into a SAML token can make this a bit more standard, but suffers from the same issues that plague JWT tokens with baked-in scopes. Namely, until those tokens expire, users have all the permissions that those tokens confer.
For our ATS example, an enterprise customer may want to assign the candidate-admin and job-admin roles to users that have a “department” attribute equal to “Talent Acquisition” (ABAC). They may also want to assign the job-admin role to managers, but scoped to jobs in that manager’s organization (ABAC mapping for a role to an organization-scoped set of resources).
Enterprise Authorization requirements
To summarize, EnterpriseReady authorization requires you do the work up-front to separate authorization from authentication. Doing this will give you an architectural leg up in building out your authorization system over time and meeting the sophisticated requirements from your enterprise customers.
Minimum requirements
The minimal set of functionality to have an EnterpriseReady authorization model:
- Define a permission for each distinct operation in your system (the cartesian product of verbs and nouns). This gives your authorization model room to evolve without any additional re-architecture.
- Define some common roles that are “roll-ups” of these permissions (RBAC), and allow customers to assign these roles to their users.
Standard requirements
- Create at least one tier of “resource groups” (organizations, teams, projects) and allow admins to restrict roles/permissions to specific resource groups.
- Allow your customers to create custom roles, which are their own “roll-ups” of your permissions, fitting their business purposes.
Advanced functionality
- Give your customers the flexibility to map between their identity provider attributes and your roles and permissions (ABAC).
- Offer your customers an audit trail of every authorization decision that your system makes around their user access.